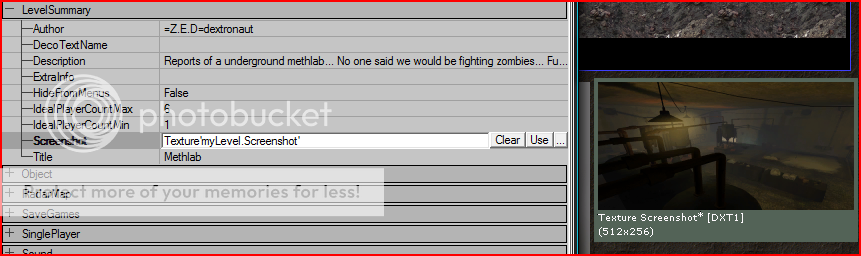
First, click the View tab on the top right of the SDK, then go down to Level Properties then Level Summary, it will look something like this:
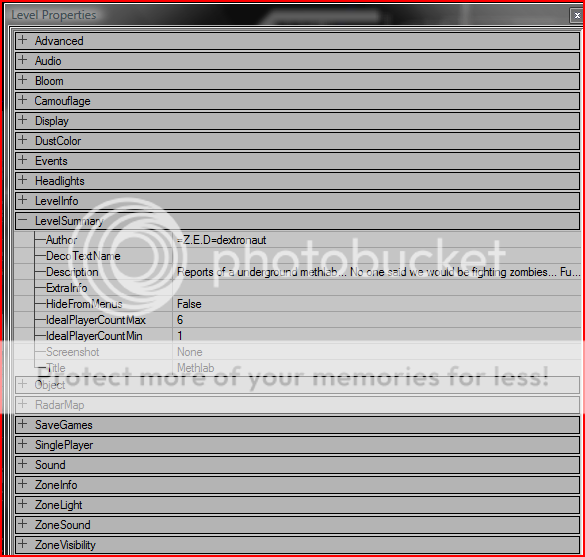
as you can see the description is where you write a summary of your map. so maybe the story behind the map, maybe a thank you list, etc. a few spaces beneath it is Screenshot. to take a screenshot of your map:
play the map, open console. type:
enablecheats (this enables cheats)
playersonly (no zombies, time is frozen still)
fly (you can fly around your map to get better screenshots)
ghost (you can go through walls etc)
most importantly: togglescreenshotmode (no more hud, etc!)
dont forget to type that again because if you dont, later you will find that your hud is still gone!
after you take your screenshot by pressing F9 or whatever key you have it set to, go to screenshots folder:
C:steam/steamapps/common/killing floor/screenshots (your path to the folder might be different)
open your screenshot up and resize it to 512x256 and save it as .tga
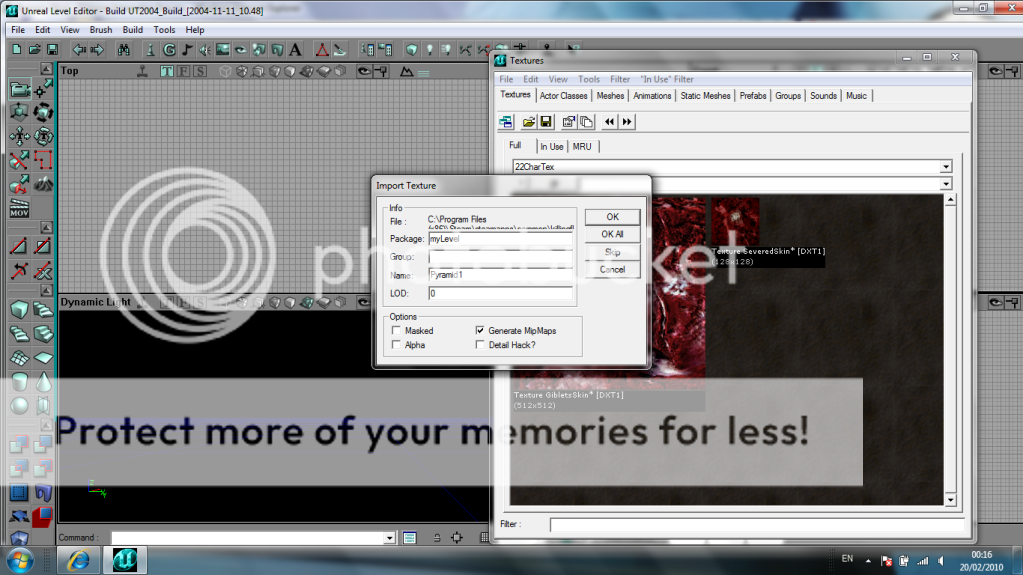
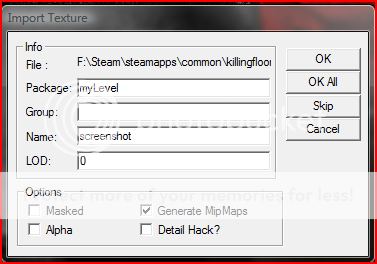
now with that done import it into your textures and when it askes what package you want to type: mylevel
for name, just type screenshot or whatever. be sure to compress it to DXT1 after its been imported (if you right click your texture, theres a option for compressing). now with the screenshot selected (its 512x256, saved under mylevel package, and compressed to DXT1) go back to Level Properties - Level Summary - Screenshot. then click USE.
this will use the screenshot that you have selected in your texture browser.
hopefully this helps someone. im not expert on writing tutorials
PS: theres also a way to have several screenshots instead of just the one. its a bit more involved, but if you want to do that then im sure you can find out how just from looking at the material sequences in the official maps.
as you can see the description is where you write a summary of your map. so maybe the story behind the map, maybe a thank you list, etc. a few spaces beneath it is Screenshot. to take a screenshot of your map:
play the map, open console. type:
enablecheats (this enables cheats)
playersonly (no zombies, time is frozen still)
fly (you can fly around your map to get better screenshots)
ghost (you can go through walls etc)
most importantly: togglescreenshotmode (no more hud, etc!)
dont forget to type that again because if you dont, later you will find that your hud is still gone!
after you take your screenshot by pressing F9 or whatever key you have it set to, go to screenshots folder:
C:steam/steamapps/common/killing floor/screenshots (your path to the folder might be different)
open your screenshot up and resize it to 512x256 and save it as .tga
now with that done import it into your textures and when it askes what package you want to type: mylevel
for name, just type screenshot or whatever. be sure to compress it to DXT1 after its been imported (if you right click your texture, theres a option for compressing). now with the screenshot selected (its 512x256, saved under mylevel package, and compressed to DXT1) go back to Level Properties - Level Summary - Screenshot. then click USE.
this will use the screenshot that you have selected in your texture browser.
hopefully this helps someone. im not expert on writing tutorials
PS: theres also a way to have several screenshots instead of just the one. its a bit more involved, but if you want to do that then im sure you can find out how just from looking at the material sequences in the official maps.
Last edited: