• Please make sure you are familiar with the forum rules. You can find them here: https://forums.tripwireinteractive.com/index.php?threads/forum-rules.2334636/

Level Design Custom 3d Maya Object

gunslingor

Grizzled Veteran
Jan 11, 2011
232
56
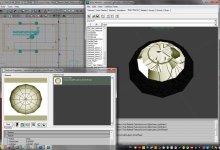
I have been modeling in maya and editing UVs in photoshop for over a week now. When I import the UV map from photoshop to maya and apply it, the shape looks fine. When I import the shape and Uv texture into KF and apply it to the shape, it does not look right at all. Does anyone know what is causing this? What am I doing wrong? pictures available on previous post, but they didn't seem to help anyone.

Let me ask this. When I model an object for killing floor, does it all have to be a single sold object or can it have multiple pieces. For example, I have a chair with a number of pieces inclulding the seat, back, armrests, and legs... all separate pieces. If it does have to be a single piece, how do i combine vertexs?

I'm dieing here folks, what is wrong with my junk?
 
  • Like
Reactions: Fel
progress

progress

Okay, so it looks like you have to export the UVs, split them in photoshop and draw your design, apply each individually to the individual surfaces, then export them for use in KF. I am making progress, I was skipping the part of splitting the textures as well as planer mapping. But now I have this problem, see attached. all the faces are randomly alligned, even though they lined up perfectly in maya.
 

Attachments

  • secondprob.jpg
    secondprob.jpg
    92.9 KB · Views: 0
  • Like
Reactions: Fel
Upvote 0
I found a work around. I import the shapes separately, place them on the map, select both of em, right click, convert to static mesh. Then delete and place the created static mesh. This seems to work completely, but I have to ask, is there an easier way for future reference, or is this how everyone does it? Thanks
 
  • Like
Reactions: Fel
Upvote 0
Sorry bout that, I assumed Maya had a similar .ase exporter as I dont know Maya yet.

I did some digging though and was able to get it to work from Maya.

Same way it did in max only alot more of a pain in the ***. I attached the 2 objects in maya. Select both objects, go to the polygons tab and find Combine. Im not sure if you need to merge the verts or not, in my case I didnt.

Make sure you have actor x loaded in the plugin manager. In the MEL box type axmesh. Export the mesh and you should be good to go, I just tested it and worked fine for me.
 
Upvote 0
Screen_5.jpg
 
Upvote 0