• Please make sure you are familiar with the forum rules. You can find them here: https://forums.tripwireinteractive.com/index.php?threads/forum-rules.2334636/

3D & Animation Wavy Laser

gunslingor

Grizzled Veteran
Jan 11, 2011
232
56
I'm trying to figure out how to make a wavy laser in Maya and import it into KF SDK. I have not idea how to animate in either realm. It doesn't necessarily have to be a wavy laser, but it needs to be impressive concert type lasers. Something like:
http://www.flickr.com/photos/djtraximus/2839296205/

or even
http://blogs.discovermagazine.com/discoblog/files/2008/07/rave425.jpg

Does anyone know how to do it and import into KF? Please help, my new map is like 85% complete and this is a big part but I guess time is getting to be an issue.

I'm open to other quicker ideas for stage lighting, I just need something really cool.

Thanks in advance.
 
well in your 3d modeler make a 2d triangle along the X/Y axis make it large we don't want players seeing an end to it. otherwise it's not a laser make some edges /\ in the middle then make ur wavey thingy. U/VProject flat along the X/y(Look directly at it. Your U/v Map Should have a Triangle on it now... ajust it acordingly(fine tune it make sure to avoid Stretching) now for something like this you want to possition the uvmap onto the premade texture instead of making the texture based on the uv.. it's easier that way.. EDIT: Oh yea and Animation is Not Needed here =) the Texture and making the StaticMesh a Mover Does that for us

then make a texture for it.. probely 3 textures, the actual texture, another simalar texture that has the lazers in different positions and a blank(nothing Texture to simulate strobe),Keep the delays in the Texture Sequence Very Low to get that Flashyness/strobe we want. that play in sequence. alpha backdrop then make draw lines in ur perfered Image editor. apply some effects like gaussan blur etc. a quick small example i made.
durp.jpg
NOTE: i made the background black instead of alpha(NothingNess) to show detail in the texture

now we attach it to your model and make a mover out of it(IMPORTANT:: NO COLLISION).. ..... thats pretty much it......

EDIT: also Maya needs the ActorX, Found Here, plugin to export to .ASE(KF StaticMesh)
 
Last edited:
Upvote 0
Okay, that's not a bad idea at all. I know actor x, but have other questions.

MAYA/UVs/Textures
I used to be able to, as you said, map the texture onto the uv but can't anymore, not sure why. When i click uv map it always changes the texture to checkered, and there are never any controls to stretch or more the texture. I had to reinstall and that's when it changed. I always have to use the UV editor which I dislike. Any ideas?

Texture Making
Alpha channels have never worked for me, or I have never gotten them to work. I always have to make a transparency map and combine that in sdk. I have tried for hours to use the alpha channel with zero luck and gave up. Any advice? Also, I can only use BMPs in KF, probably because I don't know enough to use the other files... KF is so sensitive in regards to image settings.

I have made animated gifs a long time ago, are BMPs just as easy? What software do you recommend, been a long long time...probably a decade since I had the need.

Movers
I have made door movers and trader door movers, but never really animation movers. Any good tutorials or is it easy to explain?


Other than that, I think I know how to do the rest. Thanks man.
 
Upvote 0
Okay, that's not a bad idea at all. I know actor x, but have other questions.

MAYA/UVs/Textures
I used to be able to, as you said, map the texture onto the uv but can't anymore, not sure why. When i click uv map it always changes the texture to checkered, and there are never any controls to stretch or more the texture. I had to reinstall and that's when it changed. I always have to use the UV editor which I dislike. Any ideas? I dunno either at least not for Maya, laugh if you want but im a blender user and it's served me well so far. even has a working PSK/PSA exporters.. anyways ummm yea Anyone Got a Know how on this?

Texture Making
Alpha channels have never worked for me, or I have never gotten them to work. I always have to make a transparency map and combine that in sdk. I have tried for hours to use the alpha channel with zero luck and gave up. Any advice? Also, I can only use BMPs in KF, probably because I don't know enough to use the other files... KF is so sensitive in regards to image settings. regarding alpha channels.. after you import your image find it in the editor and open it's properties->Surface->Turn bAlphaTexture to true =)

I have made animated gifs a long time ago, are BMPs just as easy? What software do you recommend, been a long long time...probably a decade since I had the need. to be honest i didn't know .gif could be imported.... i was thinking more along the lines of multiple .dds textures(For FileSize and it's a Built-in native format so it loads faster....good for performance) importing them all, turn each of their bAlphaTexture to True, then make a new texture right within the editor (MaterialClass=MaterialSequence) then from that put ur already imported textures in it and have their delays Really Really Short im feeling a 0.1-0.3 second delay maybe less. and tha'll be the texture you link to the Static Mesh

Movers
I have made door movers and trader door movers, but never really animation movers. Any good tutorials or is it easy to explain? umm yea.... http://unreal.gamedesign.net/tutorials/5/wolftut5.html looks good to me.

but basically what you do to make a mover is have ur static mesh selected in the StaticMesh Browserwindow then place ur builder brush where-ever you want it or in the general location.. now in the left toolbar where ur add/subtract brush tools are; right-click that box that has arrows pointing out of it.. you should now see your mover where ur builder brush is. it'll be purple in the 2d(top,side,front) windows and well you just see ur mesh in the 3d window. from there place it and rotate it however you want. after ur done that'll be the Origin location..aka Key0

Now!!! what we want is to tell the locations and rotations we want to be aka Make them keys(max is 24 keys) which is Really Really Simple All you do it Open the Mover's Properties->mover and look for the KeyNum var it should be set to 0 by default.. again Key0 is your Origin and sense you've already placed it and rotated it how you like all you do now is::

Type in 1 into KeyNum, Move and Rotate where you want the mover to be Next(Please note that the Mover Glides to the key so you don't have to make the keys be frame by frame) when ur happy with the position and Rotation type in the next key which would be 2 in this case. you should take note that the mover will return to it's Origin location/rotation thats a good sign =)... now move it and rotate it to the next position and so on and so on..... i think able 5 keys(0,1,2,3,4) should do the job well. **Side note you might have guessed it by now but Basically what a key repressents is a Location and Rotation. by that i mean after you make that mover you will have to make a second my scratch because altho key0 has changed key0-4 will still go to the exact location/rotation you set before. so if you copy paste it then you'll have to redo all the keys you have made.

after we have the keys set up now we need to set it to loop that "Animation" or Mover Sequenc **again please note that it will Glide to the net key in the loop within a certain amount of time you set it to.. you can make it faster or slower via Properties->Mover->MoveTime** anyways first things first we DoNotWant the Mover to Stop after it Encroaches(Smashes us againced a wall for instance) something so change that MoverEncroachType to ME_IgnoreWhenEncroach Now then to set it to loopconstantly Properties->Object->ObjectState change that to ConstantLoop....

and Last the Most IMPORTANT PART!!!!
- we don't want this to move players or anything like that much less we don't want to kill them so we need to Turn off ALL COLLISION for this Mover. go to Properties->Collision set them all to FALSE set those numbers to 0 and leave SurfaceType Alone


hmmm i probably forgeting something but thats all i can think of on the top of my head..... ermmmm... GoodLuck =)


Other than that, I think I know how to do the rest. Thanks man.

So umm yea
 
Last edited:
Upvote 0
I need help

I need help

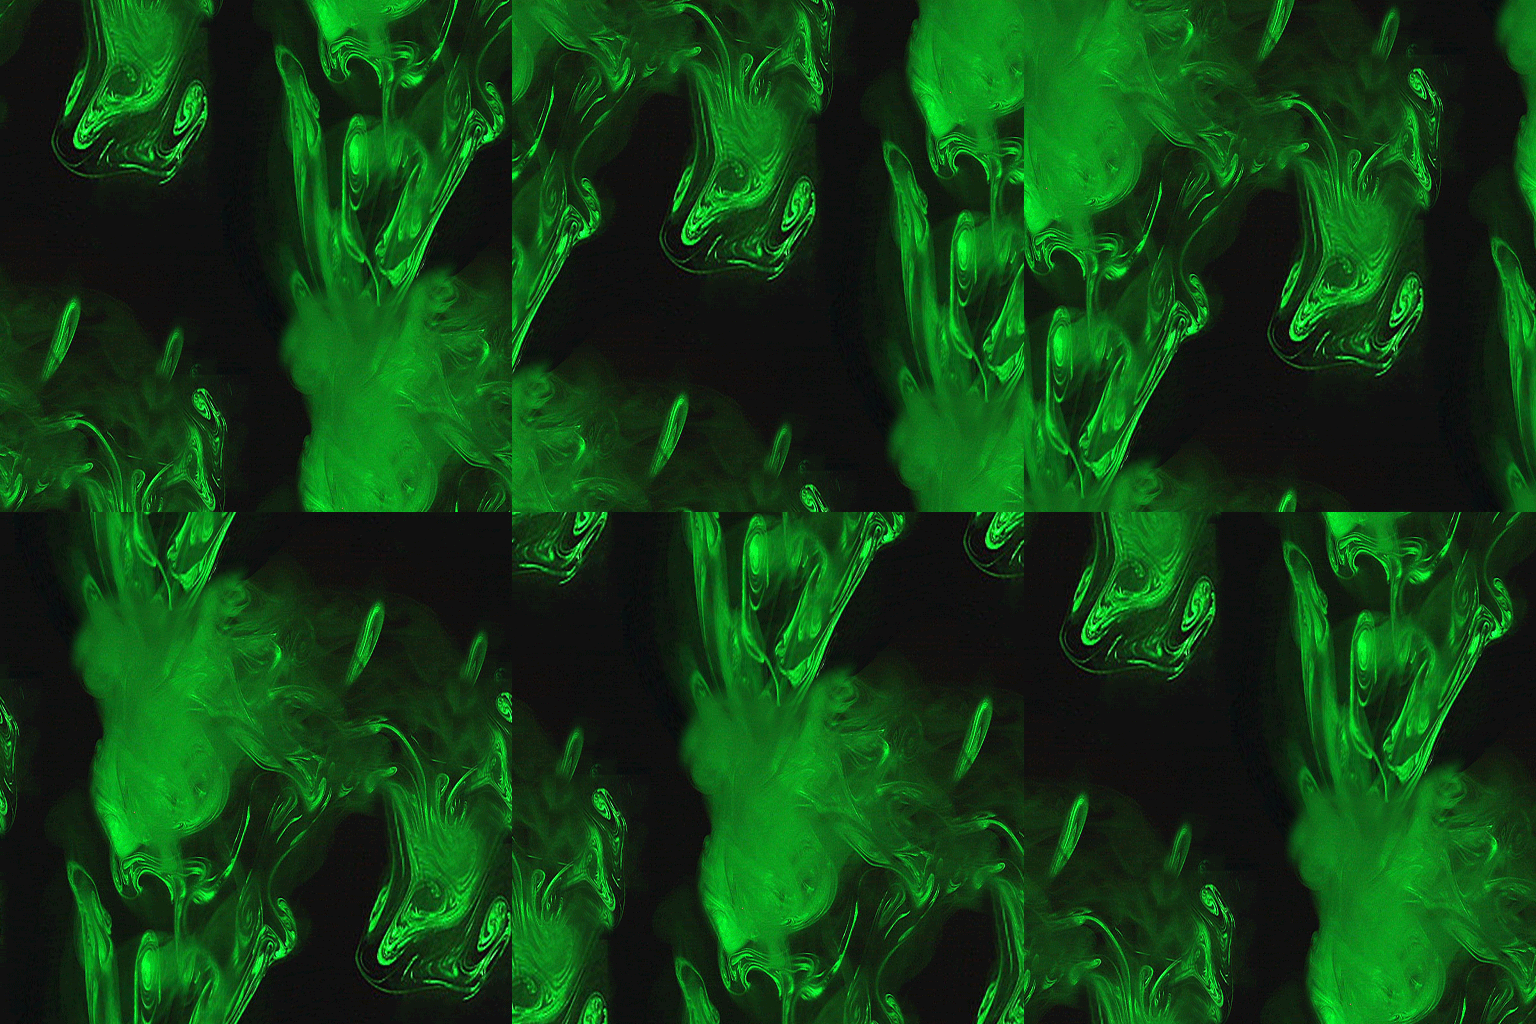
I know how to set up KF for alpha channel texture, but how do you actually set it up in Photoshop? Could someone perhaps grab the animated green smoke gift above, make the black green and make it roughly 50% transparent?

I really hate to ask, but this will take me weeks to learn this alpha channel stuff... I just can't seem to grasp the concept. I hate to ask, but I do help lots of people with Photoshop stuff all the time, so I guess it isn't unreasonable to ask the community.
 
Last edited:
Upvote 0
you only need one frame to animate that for kf, you just make a panning texture that uses that green smoke. if you import each frame and link-anim that way, that is a lot of extra textures that you dont need that make your package/mylevel bigger unnecessarily.

normally there are 3 channels.
red
green
blue

each channel's intensity is controlled by black and white.

so if the red channel is all black, and the green channel is white, and the blue channel is black, then your texture output will be green.

same goes for the alpha channel, all it does is occlude the other channels, so if the alpha channel is black, nothing happens, if it is white, the whole textures will be transparent.

i hope this simplifies things for you, but i will whip up a alpha version of your green smoke to use as a panning texture, when i have time.

it was easier than i thought; here you go:
http://www.gamefront.com/files/20768071/smokeanim.utx
 
Last edited:
Upvote 0
Lasers

Lasers

Yo, thanks guys, you really helped!!

sorry about the poor video quality:
laser - YouTube

Now I just need some tweaking and line lasers, maybe a couple color spotlights and I'll be good! Thanks again guys, I think I can get the other stuff done.

Question: with movers, if your trying to rotate something 360, how do you stop it from going 180 and then backwards 180?

THANKS AGAIN HOMIES!!!
 
Last edited:
Upvote 0
hey, this smokey laser is really starting to look bad ***, thanks fellas. I'm going to go ahead and ask it, even though I don't think there is an answer to it. Is there a way to stop projection of the laser through materials? You know what I mean? I mean I have this static mesh and as long as I am careful where I point it it looks cool, but if half the laser where blocked (by anything, even a player) is it possible to make the mesh invisible after it travels through the blockage, almost like casting an invisibility shadow over part of the mesh. Answer, no I would guess.

Other question, I have two of these lasers spinning all other the place which is cool. How do I set a timer so it comes on for some random period and off another random period?

Other question, lol, since I have two of these working ini parallel, is there a way to un-synchronize the two textures?

Ok, yall have really really helped enough already, thanks, you have no more obligation..lol
 
Upvote 0
well, now this thread is more suitable for "level design" forum, but why dont you try experimenting with using an emitter for this (can use mesh, sprite, or beam, depending on what works best for what your are trying to do)

using movers for this is kind of thing is the beginner's approach, but when you start wanting better looking effects, try combining emitters and projector+mover.

edit - maybe even a vertex animated decoration would work for what you are trying to do.
 
Last edited:
Upvote 0