• Please make sure you are familiar with the forum rules. You can find them here: https://forums.tripwireinteractive.com/index.php?threads/forum-rules.2334636/

Level Design Setting up the overhead map

I would like to have the capzone showing like in-game, you know with the red/blue color when active/captured by axis/allies...
I know there is this tutorial: http://wiki.tripwireinteractive.com..._Stalingrad/LevelDesign/OverheadMapGeneration
For me it is totally unclear.. I made a simple overhead map, wich is accurate and show exactly where you are in-game, this is a great start, but not capzone showing...
I know i can simply draw dashed-lines over the map, but how can I achieve a proper overhead map with the capzone lines which are changing colors when captured ..???
 
Upvote 0
Ok! a few hours later, I managed to understand all about the capzone texture, how to create them and all (and we found a 'bug with them too hehe:D), thanks to Spaehling! He spent a lot of time (hours) to explain and show me how to do all from scratch!!

In return I will try to make an addition to the existing tutorial for this part of the overheadmap tutorial.
 
Upvote 0
I don't have the direct instructions but my crude way of doing it is to draw the diagram of the volume and place it in the centre of the page, save as png. Import to package and connect the png to the ROObjective icon (type tex in the search bar), go ingame and see if it matches up. Sometimes it doesn't and you have to keep editing bits off and importing again until it all matches. If anyone has a faster way than this I'd like to know.

For the overhead you just make the maps bounds volume covering the area you want on the map, lift it up to 7000 height, go into top down view in lit mode until the map bounds is around the edges of your screen and hold F9 and click in the window which saves the image to your mydocs>ro2>screenshots folder. Sometimes my file needs editing to get it to be accurate ingame then import the png and connect in world properties.
 
Last edited:
Upvote 0
I keep forgetting how to do this stuff, so here's a guide for Objectives:
1a. Select your ROVolumeMapBounds (large red square), all your objective actors, and their assigned ROPlaceable volumes.
1b. Then, take a top-down screenshot of your map. (Print Screen).
1c. Paste the screenshot in a new Photoshop file.
1d. Crop it to the ROVolumeMapBounds. Should be a square.
1e. Resize the screenshot to the same size as your overhead map (1024x1024).
1screenshot.jpg

If you did everything right, should look like the above pic.

2a. I cut-n-paste my overhead map on another layer for a check.
2overheadmap.jpg

3a. Changing the overhead map's opacity, I can see everthing lines up well.
3opacity.jpg

4a. The Objective actors tell the game where to draw your objectives on the minimap.
4objectives.jpg
 
Last edited:
Upvote 0
Now the fun part.
5a. Draw stuff on a new layer.
5b. I use the marque tool to select around the an Objective's ROPlaceable Volume.
5c. Fill with white.
5d. Use the marque to select an offsetted area inside the white, and cut.
5e. This leaves a nice crisp white border.
5f. Place a Black Dot on the Objective actor, you'll need this later.
5drawstuff.jpg

6a. Draw borders and dots for each objective, each on their own layer.
6layers.jpg

7a. Open a new Photoshop file with a size of 512 x 512.
7b. Divide it up with a checker pattern so the center is easily seen.
You can use the image below.
7blank.jpg

8a. From your overhead photoshop file, copy-n-paste a layer for the objective.
8b. Drag the layer so the black dot on the center of the checker.
8copynpastelayer.jpg

That was easy.
 
Last edited:
Upvote 0
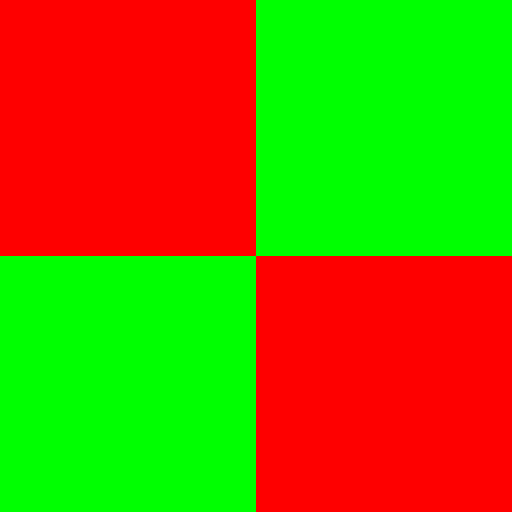
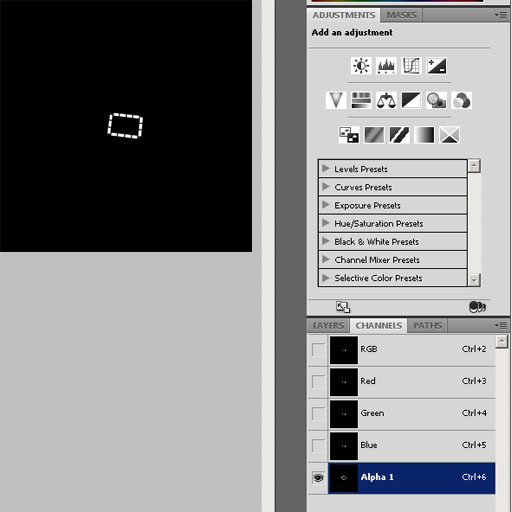
9a. Next, change the background to black (fill).
9blackground.jpg

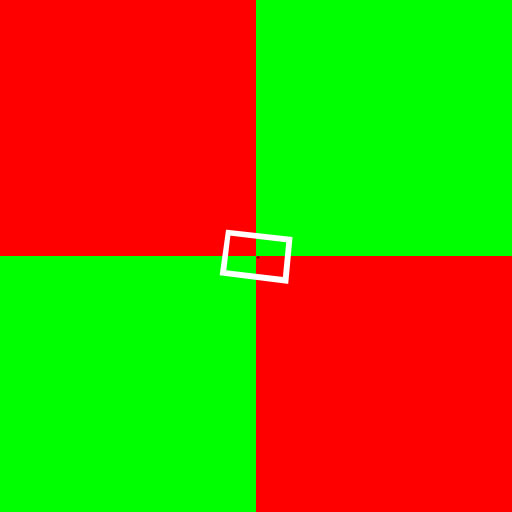
10a. Break the border into dashes (short lines). I used the erase tool.
10b. Flatten the image to one layer.
10c. Select ALL, and copy.
10d. Goto your channels, and paste in the alpha channel.
If you don't have a alpha channel, add a new channel and paste.

10alpha.jpg

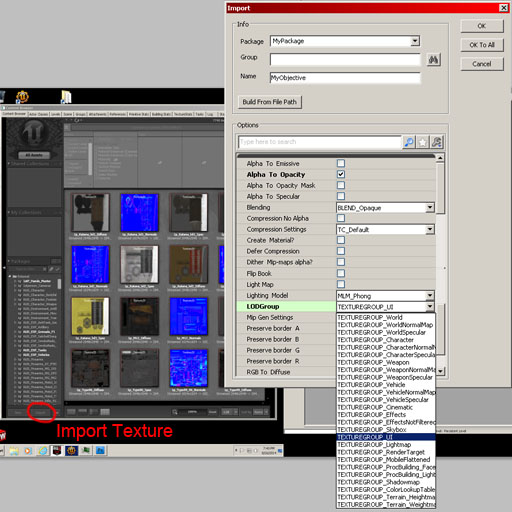
11a. Save your image as a 32 bit Targa (tga).
11b. Open the editor (SDK), and import the tga into your map package.
11c. make sure the "Alpha to Opacity" is ticked.
11d. "LODGroup" must be set to TEXTUREGROUP_UI.
11e. OK
11import.jpg

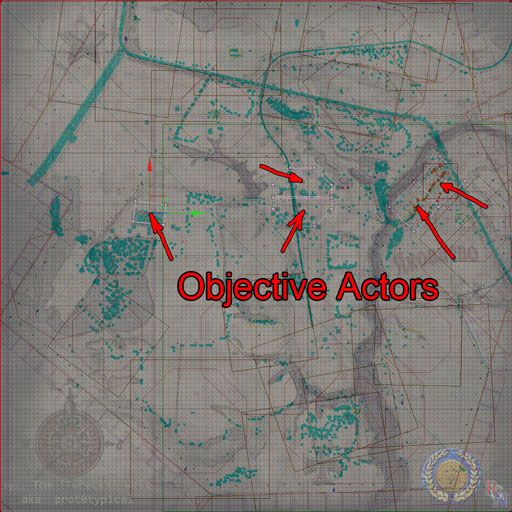
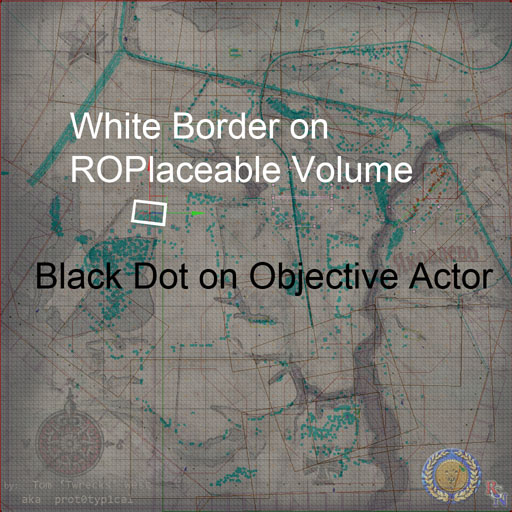
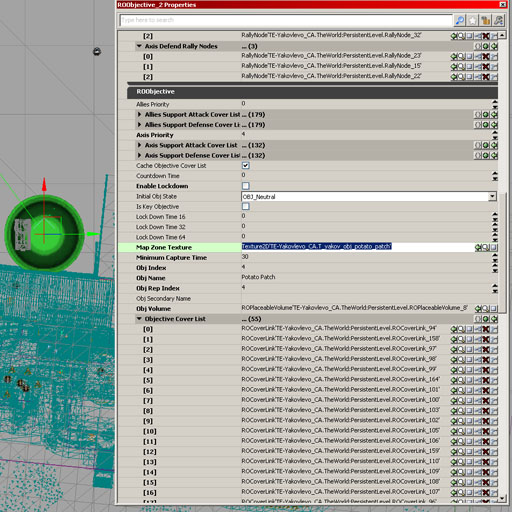
12a. Find your objective actor and open it's properties (F4).
12b. With your new objective texture selected in the browser, click the green arrow for "Map Zone Texture".
12properties.jpg

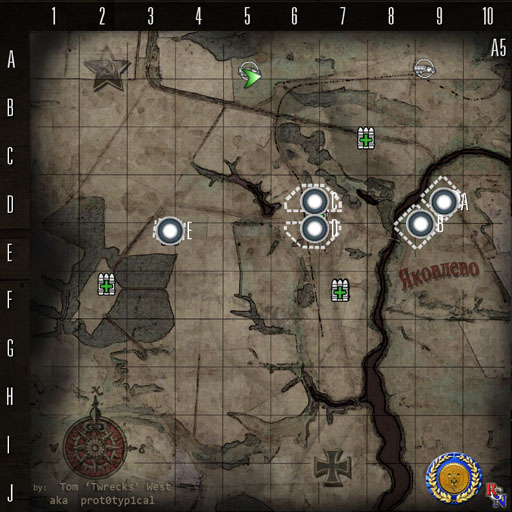
13a. Save your map. It will compress your new texture for in-game use.
13b. Play your map and bring up the minimap.
If your overhead map is assigned in the world properties, and all your objectives are set up properly in Kismet, everthing should look fine.
13done.jpg

WARNING, if you move an Objective actor, or the ROplaceable volume seperately, you will have to do all this again. Move them together, and the border will shift with them.
 
Last edited:
Upvote 0